Today I went hunting for bluebirds
My aim was straight and true
Not every day do you find bluebirds
Nor are blue birds always in season
And not everyone goes hunting or gets one for themselves
Bluebirds are hard to hunt and are not for all
It takes bravery
It takes courage
It takes faith
It takes time and then more time followed by even more time
I have been waiting for 2 years to go hunting
My mind is right
My heart is pure
And my purpose is clear
Along the way I see an eagle, like that on a Mexican flag
I pause in excitement, and stair in awe
One day I want to fly like the eagle
I see a great owl, the wise and mighty owl who says, “WHO!”
And I briefly question, “exactly who hell am I to be looking for a bluebird in front of an owl.”
Alas there is a raven – “NEVER MORE~quoth the raven”
And my head drops as I press on.
Finally my time has neared and it is time to take my shot
The blue bird is within grasp
I can see it looking back at me
Just then, as I pull the trigger,
He closes his eyes, drops his head and flies off before
Was his head dropped in sadness or shame
Was it sadness for him or for me
Was it shame for him or for me
His eyes closed as he could not bear the sight
As the other 3 – the eagle, the owl, the raven – fly off with a squawk
Echoing, “really!!! — never more”
Today I went hunting for bluebirds, my aim was straight and true
My aim was obscured by the dark grey clouds above
Which turned into rain
And even though the rain fell and gave a sheen to the apple in the tree
The apple does not seem to be so bright
Its red color not so red
It does not shine as it once did
As the rain fell it seemed to make the apple even bigger than before
Today I went hunting for bluebirds, now I start to venture home
I left with sorrow and second guesses
I am reminded that I dared where not all dare
I missed, but those who don’t shoot miss 100% of the time!
My bluebird will not be mounted on the wall this time
I will not be able to say, “I did it!”
As I am chastened, but I am not dead
I will get up,
I will fly like the eagle
The story of how I went hunting for bluebirds is there for my kids
And above all and above me is the dove who shines his light on me
Dinner?!?!
“Dinner’s Ready…”
“But that is not dinner, that’s Breakfast…”
“ok, well were having ‘Breakfast Dinner’”
Why do certain foods have to be for certain times of the day? And why is ok to cross-over traditional “dinner” items – steak & eggs – into breakfast; but not cross over breakfast items into dinner?
I am here to say “BUNK!” (well there is a few other choice words I would use, but this is a Playskool approved site). Food is food; be it consumed for breakfast, lunch or dinner. It is all nourishment and should all taste good. Dessert is good for you too; but with all food is should be consumed in moderation. Listen to the body. If the body is carving a bowl or cereal, toast or eggs, chances are the body needs something (carbs, protein, calcium) that would be found in one of those items.
Some may say, serving a bowl of cereal for dinner is lazy. But if a bowl of cereal is good enough at the beginning of the day why could it not be good enough at the end of the day? And the same should be said of all “breakfast” items. In fact, in todays society there is often less time to create a more in-depth, complex breakfast items in the morning. Not to mention when your a person cooking for many sometimes you need a little help from something quick and easy.
In my house, pancakes and waffles are the king of specialty breakfast items; be it they are topped with a pecan syrup, caramelized bananas or a brown sugar apple and raisin mix. But oh so many times it is French Toast that is cried for. Now in truth, the French do eat a version called Pan Perdu. In Europe, it is typically served as a dessert with a fruit or ice cream topping. As Americans, it was our pure obsession to eat sweet things for breakfast which transformed the French Toast into what it is today.
Even though French toast is “sweet,” it does not mean it could not be served for dinner or modified to add a bit more nutrition to the dish; using a high quality syrup, a whole grain artisan bread, fruit topping are just a few example. Remember, ingredients are only a part of the equation when eating healthy; portion size being the other half. The point is to make good food to put into your body (healthy and tasty). Note – good food doesn’t always have to be fancy food. Some of the best food you will eat will be “humble” food; and there is nothing more humble than bread!
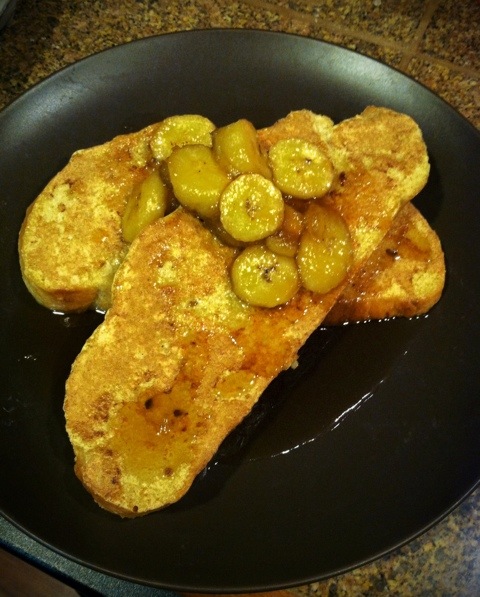
The other day, I made a beautiful French Toast for my family and yes it was for dinner. I made my own bread, but you don’t have too. I make my own for a couple of reasons; my kids love homemade bread, it is an extra practice in honing my skills and I have secret love affair with baking. Now, I could bore you with a 3 day recipe for a good Sourdough; then again, you could simply venture to a high end or specialty store where they will carry a fresh sourdough boule. Especially in today’s culinary world, a great deal of stores carry quality bread; in efforts to get their slice of the “pie.” I also topped my French toast off with Banana Syrup. Mind you, my French Toast was also served with wine…but we will get to that.
Banana French Toast
6 slices of sourdough
5 each eggs
1 cup milk
1 tbsp cinnamon
1 tsp vanilla
2 each banana
1 cup maple syrup
1. slice bananas about 1/4″ thick. Quickly sauté them in a skillet with a small amount of butter. cook for about 2 mins, then add syrup. bring boil to a boil and turn off heat.
2. whisk together eggs, milk, cinnamon and vanilla. pour into a pan big enough to hold a slice of bread (9×9 is recommended).
3. heat a non-stick griddle (if the griddle is not non-stick, spray with pan coating) on medium heat till hot. dip bread into egg mix and let soak for about 1 min on each side.
4. remove bread from egg mix, allowing the excess to drain off prior to placing it in the skillet.
5. cook for about 2 mins on each side.
6. place on a plate (2 pieces per person) a top with Banana syrup and ENJOY!
Now back to the wine! As I have always said, “There is a wine for every time and every occasion.” Breakfast-Dinner is no different. Is not Breakfast-Dinner food? If you eat it, does it not nourish you, does it not taste good, does it not still require the same love and attention as any other meal?!
When you break it down, food is food. All food has flavor no matter what meal period you are serving it for. And it is the flavors of food (not the “meal period”) that you are pairing with wine. For this one, I choose California Girl from South Coast Winery. California Girl, or Cali Girl as it more affectionately called, is a table white wine. Even though it is classified as a “table” wine, it is far from drab. Cali Girl is a blend of 6 different grapes, primarily of Sauvignon Blanc. The blend of these grapes gives the wine a subtle sweetness as well as nice fruit aroma. It is this delicate balance that also gives the wine a good opening and a nice finish; it also gives it the ability to be paired with a variety of different items–including Breakfast-Dinner. In fact, when pairing Cali Girl with French Toast; the toast itself will help to bring out a nice grassy note and the Banana syrup with help to emphasize a sweet fruit flavor. It is a really nice pairing, but is it the only choice…..
Fishy Friday
Ok, so it is that time of the year again. The air is cool and crisp, in fact winter was just extended. The beads and masks are out. The Saints are march and the bands are playing. The cops are right around the corner and we just got “Fat” on Tuesday–it’s Mardi Gras time!!! Which in turn also singles the beginning of Lent.
Now most of us, know the history and the purpose of lent. Although, over the years Lent has been changed to giving up beef on Fridays. Thus fish Fridays was born. Now just because it is Fish Friday, it does not mean it has to be plan or boring, nor does it have to be a Clam Chowder or Fish’n’Chips. A Fish Friday can be and should be fun and exciting. There is a whole ocean of fish out there — explore the world of possibilities.
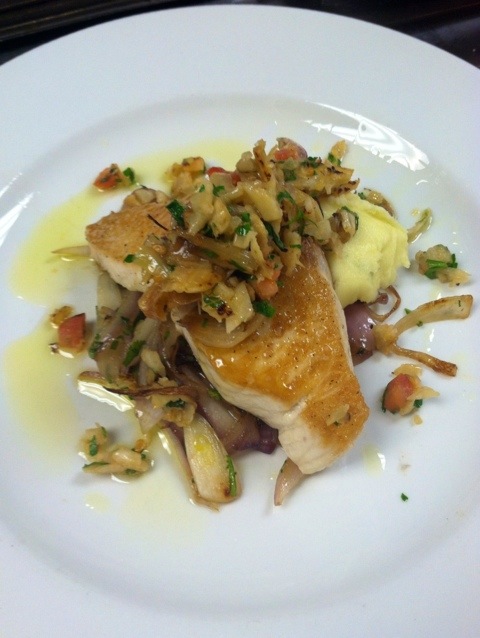
This story is about one fish that is great, and if your not careful it will swim on by. As with most fish, this fish in-particular is great seared, baked, grilled and (my personal favorite) crusted. Ok, this fish is not crusted, but hey we can’t always have what we want. However, this fish is fresh and vibrant, it is also a little different (which is the way I like it and want it).
Being the West Coast kid that I am, I usually bring most of my fish in from the Pacific. That is not to say that Atlantic Seafood is inferior; but, it is to say that fresher is better. You should always choose your seafood based on your location. As with housing, Seafood is all about location, location, location. Most seafood is already caught miles off the coast; and would it still be the freshest if it had to travel to another coast? Plainly, the closer to source you can acquire something, be it meat, veg or seafood, the better it will be.
Today’s fish is brought to you by the Fiji Islands and the letter E. T letter E is for Escolar, and not to be confused with Escarole (which is a beautiful green and a different story). Escolar is firm white fish. In fact, it is also known as a “White Tuna” at times. Escolar has a slightly buttery, rich flavor. Due to it’s natural flavor, Escolar holds up really well to spiciness; chili powder, cumin seeds, cilantro rub, jalapeños and other chilies are just a few examples of some spicy possibilities.
For all the positives of Escolar, there is one draw back. Escolar is considered a “fatty fish.” Most times, fatty fish will refer how it feels on your palate and how it will react with side dishes. To some degree, Escolar is no different, and yet still different. It is recommended not to eat more than 5-6 oz at a given time. There is a possibility of reeking havoc on your digestive system when eating more than 6oz at one time (unlike other “fatty fish”). Even though it sounds small, it is not. There is plenty of flavor to make up for the missing ounces on your pate; not to mention a standard fish portion is only about 7-8oz.
Again, for this fish, I did a quick play on various accompaniments as well as serving the fish in a non-traditional fashion; with Mashed Potatoes. Some may say that fish should not be served with mashed potatoes.
Why?
Some believe that a Mash is too heavy as well as too fatty that would over power fish. Mashed Potatoes are a great side and not just for beef. In my humble opinion, it is Mash Potatoes for all. Keep two things in mind though, the size of potato portion should be smaller than the size of the protein on the plate; and the type of fish will determine if it can handle mashed potatoes (lighter, flaker fish will less likely hold up).
Instead of a standard sauce, I finished the fish with a nice relish–a Fennel Bruschetta to be exact. Then the main ingredient of a standard Bruschetta is tomato; sub out tomato for Fennel and thus a Fennel Bruschetta is born. This will add a bit of citrus tones, and anise flavors (both of witch pair extremely well with fish). Relishes are a great way to complement fish with out overwhelming the fish–healthier too.
Escolar
4 pieces 5-6oz Escolar
salt/pepper
Fennel Bruschetta
1 each fennel
1 each lemon zest
1 each roma tomato
2 each garlic cloves
1/2 bunch parsley
1 tbsp olive oil
salt/pepper
Caramelized Cilantro Onions
1 each Red Onion
1/2 bunch Cilantro
salt/pepper
relish:
1. cut the top of the fennel off, followed with cutting it in half and coring.
2. Medium dice and sauté in a hot sauté pan, with a little oil till tender. set aside and let cool.
dice tomato and add to a bowl, then add zest, minced garlic and chopped parsley.
3. when cool, add fennel and mix. season with salt, pepper and oil. set aside.
Onions:
1. Slice onions thin.
2. sauté onions in a hot skillet with a touch of oil till tender and rich, warm brown.
3. pull from heat and season cilantro, salt and pepper.
Fish:
1. season both sides of the fish with salt and pepper
2. cook the fish in a skillet on medium heat, about 3-4 mins on each side…depending on the thickness of the fish.
3. when done the fish should be white and opaque
4. for plating- equally divide the onions to four plates. Lay of piece of fish on top of the onions, then top each fish with a spoon of the bruschetta. finally, drizzle with a bit of really good EVOO for a flavor boost.
The flavors of this dish jive extremely well together or independently. If you rather not sauté it, you can easily grill this fish. For an even more intense experience; quickly sear the fish on each side, then put every thing in a foil bag (onions-fish-relish in that order). Place the bag in the oven and roast for about 10-15 mins. No matter how you prepare the fish, don’t forget the wine!
When I think of Escolar, I taste a Sauvignon Blanc in mind. A nice wine with grassy notes and a slight citrus finish. A wine with a nice body and smooth finish. This wine screams white fish as well as “caramel” (a flavor achieved from searing food). Again, does it have to be a Sauvignon Blanc–No. Remember, wine pairing is to one’s own choosing. There is no right or wrong answer. ENJOY!
Raisin of Bread
Ok…it has been a while, and in some cases too long; but then again we all need a rest! And with my union break over, I can truly say it is good to be back at the keyboard. Now yes i know tis the season for sweets, love yous and ultra romantic dinners; however, I will be working and wont much be in the mood for all of that–don’t worry though in time they will come. For now, what I am in the mood for and what I want is a good Raisin Bread.
When ever I think of Raisin Bread I automatically revert back to my child hood. As a child I spent a great many of weekends at my grandma’s. For breakfast you could almost guarantee there was going to be Raisin bread toast, even when we were having Spaghetti and Eggs.
As I grew up, especially going into my bachelor years (or months for that matter), I also made sure there was Raisin Bread in my house. Early on, I always bought my Raisin bread (just as grandma did) it was good and it was consistent–but not cheap. Even now as an old man, I still love Raisin Bread and I have passed that love on to my kids. Today, the difference being I make my own Raisin Bread and as my kids continue to grow I will teach them how to make their own.
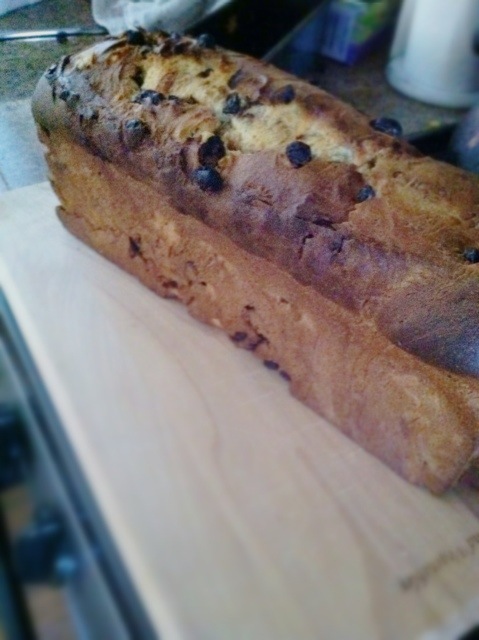
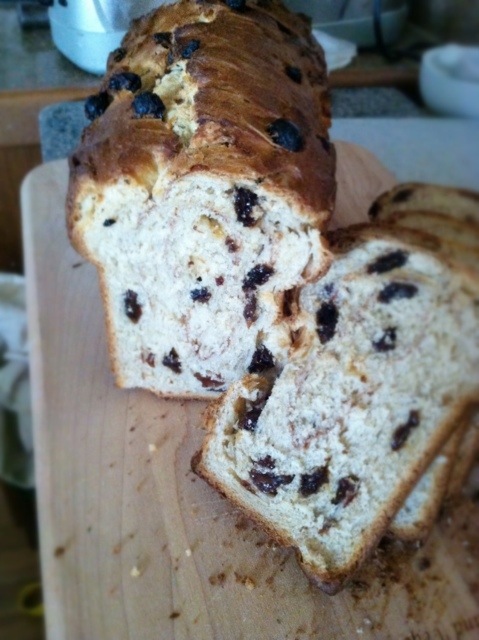
Raisin Bread (well mine at least), is a variation of Brioche bread. What is Brioche bread?? Well Brioche Bread comes from France and it simply means it contains butter and eggs (standard bread does not have butter and eggs). The butter and eggs will add richness in flavor and mouth feel. Technically, the fat of the butter and eggs will soften the gluten strands. Softening the gluten strands will break down some of the elasticity of the bread itself. Basically the bread will tear apart a bit easier – “the crumb will be more tender.”
Most times there is also a bit more sugar in a Brioche than a standard bread. All of this being said, Brioche lends itself very easily; to fruit, chocolate, spices, to breakfast or dessert. One the best things my grandma did, was take her Raisin Bread and turn it into French toast! And who is to say you can not have a french toast for dessert, topped with honey and Vanilla Ice Cream.
Just as with any home made bread, there is a down fall–it takes time. This recipe will take about 3 hours to make. It could be rushed, but why would you want too. Not to mention, when this bread is in the oven, you will understand and agree it was worth the wait. Remember! be patient. When the bread comes out of the oven don’t just rip it open and dive in. Let it cool to room temp prior to cutting.
Why, you may ask?
When any bread it is cut open right away, it will release steam and thus releasing moisture. By waiting to cut the bread, the moisture stays in the bread and makes for a better bread. And when it comes down to it, it is about better!
There are some key tips to help make that better bread.
First, give yourself time and forgiveness. Forgive yourself now if it does not work, your are not a master baker. And dont rush yourself, have fun with it!
Second, use the right ingredients. Bread flour, is high in protein and thus produces a better gluten. When making bread, it is about all the gluten content. Yes, in Brioche we are taking steps to hinder some of the gluten building, but you still want and need gluten.
In the following recipe I use two different types of flour. The whole wheat flour is there for the flavor and mouth feel. Whole wheat flour will help give it that natural, earthy, wholesome flavor, almost nutty, — that “wow that is bread” flavor. Could you use plain AP flour, yes but it will not produce the same results nor will it produce the same flavor. When it comes to baking you really need that natural protein in flour. Whole Wheat does not have enough, so if you used all whole wheat flour in bread it will come out too dense. Where as AP flour is so processed, chemicals have had to be added (not to mention the flavor is gone from it). Yes, flour has flavor and it is that flavor and performance your looking for.
Lastly, take your time and let it do its thing. A lot of making bread (any bread), is to hurry up and wait. However, on the plus side, it will give you time to; read, drink a cup of coffee, do some chores, take nap or just relax. It is the beauty part of bread, it does not require constant attention. In fact, some times, the more time you give it the better; then again to much time can be a bad thing for bread–so be careful.
Raisin Bread
1/4c hot water
1 c milk, room temp
1/3 c sugar
4 oz butter (soft and room temp)
2 ea eggs
2 c raisins
3 c bread flour
1 c whole wheat flavor
2 tspn kosher salt
cinnamon
1. in a stand mixer add milk, water, sugar and yeast. stir to dissolve and let sit for 10 mins.
2. add butter and eggs, mix till combined
3. add half the flour, then raisin, then the final half of flour and salt. Mix on medium for about 7 minutes using a dough hook. This kneads the dough and helps to build gluten. a ball should form that is not too sticky but not completely dry.
4. place dough in a clean greased bowl, cover, then place in warm spot. let the dough rest and rise for about an hour (or till doubled in size).
5. dump dough onto a lightly floured work surface. then do a letter fold–folding one side into the middle then other side over the top. followed with the same fold on the opposite ends. place dough back in bowl, cover, place in a warm spot for about another hour.
6. dump dough onto a floured work surface and place flat about 3/4”-1” thick and roughly about the size of 13”x9” pan. Dust the top of the dough with a fair amount of cinnamon.
7. Roll tightly, length wise, starting away from you or towards you. just before your last roll, fold the ends on angle towards the middle, then finish the roll. folding the ends inward will help seal the bread.
8. Place roll in a bread loaf pan, you may have to squish it a bit for it to fit. make sure to press it in all the way to the bottom, cover let rest. turn on oven to 400
9. just before placing the bread in the oven, cut a slit the entire length of the bread about 1/2” deep. this will help the bread to grow and expand. Bake about 30 mins then carefully remove from baking pan.
10. bake an additional 15 mins till done. Thump the bottom of the bread, it will sound hallow when done.
11. let cool to room temp….ENJOY
Again, a piece slightly toasted with a tab of butter….OH MY! This recipe can easily be modified, with the addition or substitution of other ingredients. It maybe a day late and 2 dollars short of Valentine’s Day, but you don’t need one particular day to do something special for someone special. Turn this Raisin Bread into french toast, top with vanilla ice cream and honey. Serve it along side of a Sparkling Gewurztraminer.
Wine?
Absolutely!! A wine for every time and every occasion–Raisin Bread is no different. The sweetness and subtle flavors will pair wonderfully with the spice, sweetness and raisins of the bread. Pour a glass, slice a piece of bread, surround yourself with some good company and ENJOY!
Waffles’n’more
It is saturday morning and I am making waffles! Oh Yes, how do I love waffles. Just about every saturday we have waffles for breakfast. Most times they are topped with simply butter and syrup. During the summer time, it is sugared fresh strawberries. In the fall it is maple-brown sugar apples. And in the finally in the winter time it is boozy bananas. For myself though, waffles are not waffles unless they are smothered with Peanut butter and Jelly; then put together into a sandwich–now that is breakfast!! However, as wonderful as waffles are this post is not about waffles. This post is all about the wonderful machine that makes waffles-the waffle Iron.
Not only is this post about the waffle iron, it is also about cookies. The Cookie Monster once said, “C – is for cookie and cookie is for me!” I could not have said it better myself. Now, I am not the cookie whore or monster that he is, but I come in a close second. I do, I love a good cookie and often I will hunt for a good cookie. Earlier, this year I taught my princess how to make cookies (kid test, kid made, and mother approved) and it is a great cookie; but one never stops with one great cookie. Not to mention variety is the spice of life.
Ok, so the question may arise, “what does a waffle iron have to do with cookies?” Well…lets stop and think about what the waffle iron is. Number 1, it is a heat source. It applies direct heat from the top and bottom. Depending on the model you can also adjust the heat, even though waffles work best on high heat. Number 2, they make a really cool design on what they cook. Basically, the waffle iron is a fancy skillet that cooks from the top and the bottom at the same time.
The waffle iron can be used in the same manner as a panini machine to make sandwiches. Grilled cheese, Roasted vegetable…well any hot sandwich for that matter can be done in a waffle iron. Left over steak, if there ever is any can be heated up in a waffle iron too. Due to its design, the iron will also act like a little oven; enter the cookie.
As much as we always have waffles on saturday, we always have cookie dough in the house. I truly enjoy a fresh cookie, and rather than baking the entire batch at once I cook them in portions. Baking cookies in small portions serves a couple of purposes: there will always be fresh cookies, I will not eat to many at one time and I will be able to have more than 1 cookie. As I said before, “WE,” meaning my house is full of little gremlins whom eat everything and cookies don’t last long–NOT LONG AT ALL–again hence why there is always cookie dough in the house.
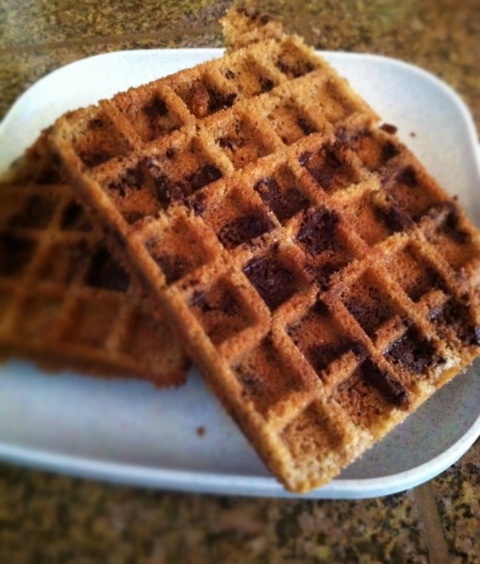
This cookie was born out of necessity, followed with a bit laziness. A while ago I saw a picture of a Waffle Cookie, I thought it looked really cool and said to myself, “I have to try it.” At the same time my princess wanted to have a Tea Party with real cookies, but she also wanted to make a new cookie recipe. Lazy…well the waffle iron was out from earlier and I did not feel like messing with the oven–whalaa a waffle cookie born. On a whole, this cookie is a simply cookie and a standard chocolate chip base (sorta). Using the waffle iron also cooks the cookie in about half of the time. Waffle cookies come out a bit on the crispy side, but that is not always a bad thing. Once they are baked, this cookie will behave as any other cookie, except look really damn cool.
The same with any other cookie base, flavors can be modified and adapted to one’s liking; nuts, chocolate, spices, dried fruits,etc.
M&M Cookies
3/4 c brown sugar
1/2 c white sugar
6 oz butter
1 egg
1 cup flour
1 tsp baking power
1 tsp salt
1 cup M&Ms
1. add sugars to the mixing bowl. add butter and mix with a paddle attachment. mix till creamy and smooth.
2. mix in egg
3. slowly add dry ingredients, just till fully incorporated.
4. add and mix on high for one minute.
5. heat waffle iron on high.
6. flatten a piece of cookie dough about 1/2 ” thick and about 3″ in diameter. place on hot iron and cook for about 5 minutes.
7. after opening the lid to the iron, let cool for about 3 mins prior to carefully removing cookie
So your eating cookies, does that mean you can not enjoy a glass of wine the same time? I have always said and will continue to say-there is a wine for every time and every occasion. Wine is not intended to only be served with elegant food. Wine is comfortable drink and pairs wonderful with comfort food. For me, and many others, nothing is more comfortable then a good cookie. Although traditionally, a Sparkling wine would be a starting course or be a celebrator drink, but I ask, “why can’t a cookie be something to celebrate or start the meal?” No, I would not actually celebrate a cookie, but in all truth a sparking wine is a good pairing for a cookie for serval reasons. Sparkling wines have the natural ability to go savory or sweet. A cookie has a bit of a salty taste that will really bring out the subtle flavors of the wine. As always keep in mind not all sparkling wines are the same. To pair a good cookie with a good sparkling, look for a nicely balanced good sparkling wine. Good food calls for good wine–ALWAYS, ALWAYS, ALWAYS.
This sparkling Pinot Grigio is a prime example of a fine wine that will pair beautifully with a good cookie. “Cookie and Wine? Really?!,” some still might be asking themselves. Yes! Absolutely and ENJOY.
Quick: a story of bread
So the best holiday of the year has come and gone (well the second best at least). The next one coming is Thanksgiving, and most people can’t wait for that Pumpkin pie. In fact, most people wait till that one time of the year to eat pumpkin; however, pumpkin is good for more than one day and is especially good for more than being carved up. And if your anything like me, you did not even carve a pumpkin, but a drew a face on it cuz you did not want to waste the pumpkin. Which then leads to, “what do you with that pumpkin till thanksgiving comes.” Yes, we could make pie early, pie is always good (as we learned in Bite ME!!!). Although, most people will only eat pumpkin one time a year.
For a long time now we have been brought up to believe that pumpkin pie, and pumpkin for that matter, is only good for one time of the year; think of it as tradition. But being a man who questions everything, I will say WHY!? I will also challenge you to break out of that mold and belief that pumpkin can only be eaten one time a year, let alone one day of the year.
Pumpkin, is classified as a gourd, but it is also a squash. As a squash it has a pretty good shelf if properly taken care of. Pumpkins should be stored in dark cool area, doing so will allow the pumpkin to last up to about 3 months; if not longer. To be honest, I have had a pumpkin sitting on my kitchen counter since mid september and they are still looking good.
Now if your into the the sport or not, you could ‘Chunk’ your extra pumpkin just for the hell of it; not to mention the pure fun. There is always a simple, pure satisfaction destroying something for the simple fact to destroy it–but that is another *story. Pumpkins don’t have to be sweet, they can be savory too. When eating a savory pumpkin it is a pleasant surprise. You mind knows what a pumpkin is and will automatically associate it with sweet; then expect it to be sweet when tasted. Pumpkins can be used as a sautéed vegetable, in a risotto, in a puree, in a vegetable medley, the possibilities are endless when using it for a side dish.
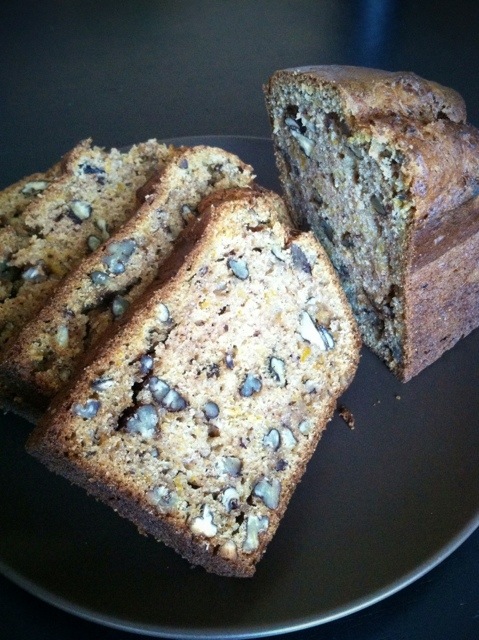
Pumpkins are more than a Jack-o-lantern. Pumpkin can also be used in the same fashion as left over old bananas–make a quick bread. This quick bread is as the name suggests–‘quick.’ There is no yeast, proofing or prolonged waiting prior to enjoying. A quick mixing of the ingredients and placed in the oven to bake. The bake time is about the same amount of time for ‘regular’ bread; but still a 1/3 of the time to make. Although pumpkin bread will require a little more prep than say banana; it is well worth it. The roasting of pumpkin can be done in advance, if not far in advance and frozen.
The question will be asked, “Fresh or Canned?” It is up to each individual to answer the question “canned or fresh?” Canned will work, but my humble opinion is fresh is always better.
This bread can be used for an afternoon snack, a morning snack with tea or coffee, made into french toast, made into a serious bread pudding with more pumpkin added, warmed then topped with ice cream and caramel; once again the usage possibilities are endless. Due to how tasty this bread is, more will be made in no time; but no worries its quick.
There is more to a quick bread, than besides simply being quick. Very easily different flavors can be added or swapped. This recipe will also help teach different baking techniques; such as fat control and baking time. It is always good to pull out your baked good a touch early. Any time the oven is used, always allow for the carry over cooking factor. The Carry over cooking factor being: any food item will continue to cook once it has been removed from the heat.
It is a known fact, fat equals flavor. It is also a known fact, that some fats are good and some fats are bad. Eggs, milk, oil and butter are all classified as fat on the ingredient list and at times maybe considered as a bad fat. Where as Yogurt and Apple Sauce are good substitutions for some fats; such as standard oil. Olive oil and avocado can also be used for substitutions as well as adding additional flavors. Beside mouth feel, the main purpose of fat is to add moisture. The fat will give a soft luscious feel to the tongue. Fats can be used on individual basis or in combinations. The basic key points for fat: too much fat will cause the final product to be greasy and undesirable; while too little fat will cause the final product to be dry and still undesirable.
When making pumpkin bread, the batter should appear to be wet and pasty; however, it should not appear to be pourable like a cake mix. If the batter appears to be a little dry, try adding a bit more “fat” to achieve that desired consistency. One of the most beautiful thinks about Quick breads is the “forgiveness” it carries. Accidents will happen and sometimes these accidents will turn into great recipes. However, there is no accident/mistake as long as something is leaned from it.
Pumpkin-Pecan Bread
2 c flour
3/4 c sugar
3/4 tsp Baking Soda
1 tsp salt
1 1/2 c roasted pumpkin
1/4 c yogurt
1/3 c canola oil
1/4 tsp vanilla extract
2 c chopped pecans
1 tsp cinnamon
1/4 tsp ground ginger
1. mix all the flour, salt, baking soda, sugar (the dry ingredients) together
2. make a well in the bowl, add eggs, oil, yogurt and roasted pumpkin (the wet ingredients) to the well.
3. stir in the wet ingredients, using a spoon or firm spatula, making small circles followed with bigger and bigger circles.
4. fold in pecans and spices.
5. pour into a greased loaf pan and bake at 350 for about 45 mins or till done.
6. let cool for about 10-15 mins, then remove from loaf pan. allow to finish cooling to room, slice and ENJOY!
Can I get an extra side…2
“But I don’t want to eat them”…..”Eat your greens!”
How many times do people choose not to eat the side dish just because of what it may look like, or they are not familiar with it, or even cause it is believed to be nasty. Why don’t people like it? Who really knows; however, people should learn why and be able to explain why they dont like certain types of food. And could there be a chance it was simply not prepared properly?
Now in truth, “eat your greens” carries a lot of weight. Green vegetables have a great deal of calcium; which we all know is good for the bones and teeth. A great deal of today’s conversation is all about eating healthy. As a Chef, I try to do my part to educate as well as provide a healthier meal for people to enjoy; it is part of my culinary obligation. The easiest and fastest way to eat healthier is to eat your greens, (on top of all the other colored vegetables).
Alas the season and the time is here, it’s finally FALL! Cool nights, brisk morning, soft breezes, a warm sun, braised food, stews, risottos and vegetable purees are abound. Fall also means the time of gourds, root vegetables and winter squashes. However, Fall does not mean it is the end of green vegetables. Brussel sprouts keep the feeling of green alive. For a log time now, Brussels have carried a negative connotation about them; however, it just isn’t true. Many times people are afraid to try them because they dont know how to cook them; not to mention they look a little funny. Brussels are an easy food to cook and carry a beautiful flavor with them.
Brussel sprouts are a funny little vegetable; in fact sometimes they are referred to as baby cabbage. I mean look at them, they look like little baby cabbages. Yes, Brussels are loosely related to cabbage, but they are their own vegetable. They grow in cooler weather. They grow on pole like plants at the base of each leaf. Brussels are typically sold full grown and mature. Although, they come in one size and shape they are not subjected to be served in that shape. As with any vegetable, they don’t have to be boring or plan.
Brussels can be served whole, leaves only, shredded, or cut in half. Shredded them and use them like slaw. Their leaves can be pulled and quickly cooked. They can be cut in half and be roasted. They have a slight bitter flavor to them that play off the sweetness of other vegetables. Nuts and animal fats can greatly enhance the flavor of Brussels as well. Due to the natural bitterness of these little gems, a bit of salt will be needed to balance out the flavor.
Traditionally, Brussels are served for Christmas, but they are good all through the fall going into winter. Brussels can be the center-piece vegetable or paired along with another vegetable. When pairing Brussels, think carrots, onions, pumpkins and other squashes. Traditionally, Brussels are also boiled in salt water then sauted with a touch of butter. But again; Brussels are capable of so much more.
When doing Brussels — always, always, always add salt. The salt will soften the bitterness of the Brussels. Simply adding a pinch of kosher salt will do the trick, but a bacon product, cheese or salted nuts are also great ways to add that salt. One of the best ways to prepare a brussel is to par-boil then finish in a saute pan with some chopped hazel nuts and bacon.
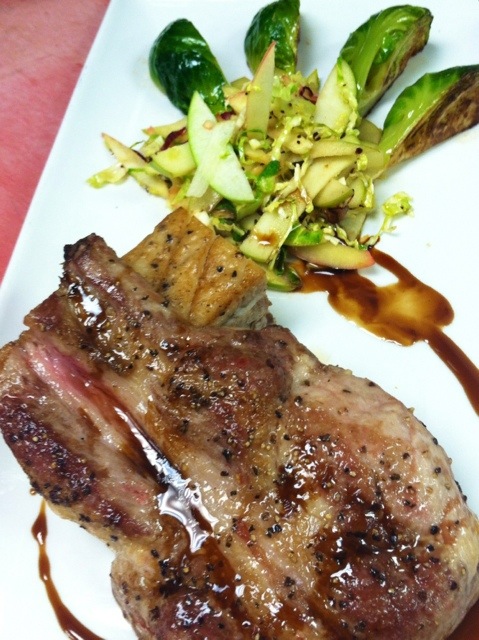
Be courages, open your palate and try brussels. Try them this way then try them that way, but either way give them a chance. People should always try something at least once. In this case I went a little crazy and did multiple techniques, well simply cuz I like Brussels, and it is just damn good. Some was boiled and some were shredded. The Brussels I shredded, was turned into a warm apple slaw; while the boiled portion were caramelized. Played around and give some brussels a go.
The following recipe may appear to be basic, but simple and basic is a great place to start when learning how use a new vegetable; especially when deciding the best way it should be prepared for one’s preference.
Brussel Sprouts
1/4 lb brussel sprouts
1/2 gal of water
2 tb kosher salt
1/4 butter
1/4 crushed almonds
1. bring water and salt to a boil
2. cut brussels in half, cook in boiling water till fork tender. then remove for the water.
3. melt butter in a skillet and add the sprouts. cook for about 2 mins, stirring occasionally.
4. add almonds and cook about 5 more mins.
5. season with salt and pepper and ENJOY
Very easily, the Brussels could have been tossed with some other flavors and seasonings. Brussels being as green as they are, behave very similar to asparagus when pairing with a wine. Look for white wines that have earthy undertones, grassy notes and subtle flavors. A Sauvignon Blanc as well as a Fume Blanc would both work nice. Both wines also have a hint of citrus to them; which will aide in pairing with the green vegetable. And both wines are fantastic minus the vegetables.
Can I get an extra side….
It’s not always about the protein! Sometimes the “center of the plate” is the starch or the veggies that supports the protein. How many times do people ask for extra asparagus or mash potatoes? As a Chef, I can appreciate and realize that the sides can make or break the dish. It is about flavor enhancement as well as compatibility of everything on the plate. Components of a plate should be able to stand alone and be great; but when paired with a protein it all should be fantastic.
I myself will choose an entree solely based off the sides. And starches don’t have to be potatoes or rice. There is quinoa, and polenta. There are root vegetable purees, cakes and soufflés too. Let´s start with Polenta. It is an extremely versatile and a great example of many different things that can be done with a side.
Polenta is Italian in origin. It is also said Italians will eat polenta in the say way Americans will eat potatoes. Polenta is a grain and behaves the same as a grain does; by absorbing liquid. Polenta can be toasted slightly to give it a roasted flavor. Stocks and broths instead of water can be used. Flavors can be infused in the liquid or flavors can be added after the polenta is done. Butters, creams or cheeses can be added for richness. The possibilities for polenta are endless. Not to mention, Polenta can be creamy and it can also be firm. A firm polenta is a nice way to add texture to the dish too.
The really beautiful thing about polenta is its simplicity. It does not have to be thrown out if it does not come out right; it can be fixed. Polenta is one of those dishes that is tucked away, and pulled out when someone wants to impress someone. A great deal of people feel polenta is difficult dish to make and at the same time they are easily impressed with it comes out great. With polenta, is up to one’s desire and cravings. Polenta pairs wonderful with all proteins; regardless of it being firm or soft (creamy). Carnivores and vegetarians alike can agree upon the greatness of polenta. As time progresses, different techniques and uses will be discovered – EX: a garlic flavored firm polenta, cut into little squares followed with being used as croutons in a spinach salad.
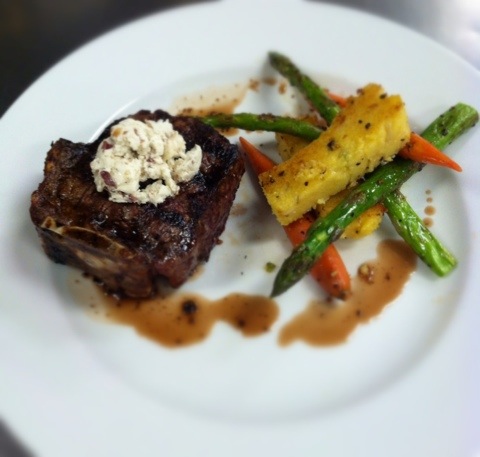
In this case, I made a firm polenta with fire roasted chiles. Which were then cut into sticks as to mimic steak fries; and never mind the fact it was served with a killer Bone-in Tenderloin (and yes it really does exist).
Polenta
1 cup polenta
2 cup chicken stock
1 garlic clove
1 shallot
3 each jalapeno-charred and peeled.
2 tbsn creme fracihe
salt and pepper
1. burn jalapenos over an open flame, then place into a container and cover with plastic for about 5-10 mins. peel of the burnt skin from the chiles, seed and small dice.
2. mince garlic and shallots.
3. heat a medium size pot, add a touch of oil, then sweat garlic and shallot. when the shallot is tender, add the diced jalapeno and cook for about 1 min.
4. add stock and bring to a boil.
5. while boiling, stir in polenta. then stir constantly while bringing the polenta up to a boil, it will thicken up during this time. stir and boil for about 1 min then remove from the heat.
6. stir in creme fracihe and season to taste. Serve right away for a creamy (soft) polenta or let cool completely for firm polenta.
7. for firm polenta – after cooled, cut into desired shape and heat up in an oven, skillet, grill or fryer. if you choose, you can boil again with some cream or stock to revert firm polenta back into creamy polenta
This recipe again can be easily modified to one’s desires and cravings. This recipe is equally great for creamy or firm. If desired, add cheese at the end. For a creamier and richer polenta, add some cream at the end too. As with many proteins, and unlike most vegetables–polenta is a year around dish and can be made to accommodate the season at hand. Allow your stomach to lead the way and ENJOY!
Splurge 2: it’s a soup!
Growing up as a kid, grandma always said, “waste not-want not.” That statement was not fully understood till I was much older. We don’t always Splurge (previous post) all the time and sometimes “splurging” is few and far between. And with any time we do splurge, we definitely want to make the most of it. One of the best ways to continue to splurge is to follow up the next day with a beautiful, rich, silky, luscious Lobster Bisque.
In this world, so many things are consider classic; the Star Wars saga, the Chevy Impala and Looney Tunes cartoons just to name a few. Food is no different; Beef Wellington, Caesar Salad and Banana’s Foster are just a few classic food dishes. Lobster Bisque is another great example of a classic dish, one problem, it is made incorrectly oh so often.
To under stand Lobster Bisque one must first understand what a Bisque really is. Bisque is a soup of French origin, which is smooth, silky and rich. Bisque is also traditionally a shellfish based soup. Now non-shellfish bisques do exist, but those usually have rice in them or they are a play on words to describing the consistency. Bisques have a very distinct viscosity to them and if they don’t – it is not a bisque, but simply some kind of other soup. Others will also try to mimic the taste of real seafood with some sort of base–that is not a bisque either, but simply salty water. That is not to say bases don’t have their place in the kitchen, but as with microwaves they need to be used correctly in the kitchen. A bisque is not something that cannot be made inside of a half an hour. This soup takes time and needs that time to develop all of its beautiful flavors. Like anything in life, anything worth while takes time.
Making Lobster Bisque does not mean busting the bank on buying expensive ingredients, followed with having them turn into mush in your soup; instead utilize what has already been purchased. As much as professional and home cooks alike will use animal bones to make stock, the same can be done with left over shells of shellfish. The shells of clams, mussels, shrimp and lobster all have the flavor of the animal they once housed. All of these shells can be combined at once or be frozen and used on individual basis.These shells do not necessarily just have to be used to make soup. A simple but highly effective and flavorful broth can be made; which can be used later for soup, rice or poaching liquid.
Although soup is a very humble course, it does not mean it does not require special attention. Quality ingredients and quality love should go into everything that is made. A good bisque requires very little work, but ample amounts of time. Making soups, sauces or broths from shells is a good way to spend money once; but eat really nice for a second time. The next time you splurge a lil’ and have shellfish, save your shells. Remember, “waste not-want not.” Combine them with some flavoring components, some liquids and then let time do its thing. The soup can be served right away or at a later time. Due to the smooth consistency of the bisque it can also be used as a sauce for another protein; such as chicken. This bisque also allows for simple modifications to one’s own desires.
Again although soup is a very humble course, it does not mean it cannot carry its own wine; there is a wine for every time and every dish. In this case one just needs to take into consideration the boldness of the flavors as well as the richness of the dish. Fume Blanc is a beautiful blend of Sauvignon Blanc and Semillon. This blend is aged in french oak. This wine is smooth with a bit of complexity to it. It has a soft open with a luscious mouth feel, which is capable of handling the richness of the bisque. This wine has a wonderful bouquet with a hint of sweetness. The taste is very appealing with out be over lingering or being forgettable. And very similar to good wine, if made properly, the Lobster Bisque will be unforgettable.
lobster Bisque
2 shells of lobster tails
1 each onion
1 carrot
2 stalks of celery
2 each bay leaves
1/4 bunch thyme
1 tb peppercorns
1/4 bunch parsley stems
1 cup tomato paste
1 cup v8
2 gals water
1 cup cream
1. rough cut celery, carrots and onions.
2. in a large pot with a touch of oil, saute vegetables with herbs/spices till tender.
3. add lobster shells and tomato paste. stir then continue to cook till paste starts to brown.
4. add tomato juice and bring to a boil.
5. add water and return to a boil, then turn the flame down to low. let the soup cook on a simmer for about 3 hours or till reduced by half.
6. drain off and reserve liquid, using a fine wire mesh then throw everything else away. return liquid back to the pot.
7. add cream and then reduce on low again. cook for about another hour or till reduced by half. strain if desired, but you should not have to. top off with a dollop of creme fracihe or even bits of lobster (if any are left). ENJOY
Season the bisque with salt and pepper, but taste it first. The peppercorns, the natural salt from the shells and constant reduction should be enough to season the bisque nicely. If so desired, you can add brandy or white wine for a little added flavor. One could also add different shells from other shellfish. Adding other shells will deepen the flavors of the bisque. Remember, soup recipes (for the most) part are just simple guide lines. When making a soup, just as making anything, it is personal preference and desires are key. The goal of a bisque — any soup for that matter — is a harmonious, balance of flavors.
One Chef’s Rebuttal

My wife recently showed me a blog post written by a chef about the role of a chef’s wife. You can read it here. The gross inaccuracies irritated the hell out of me, to say the least. So here is … Continue reading

